Neotek - Electronics WordPress Theme Download
The WordPress theme market is a brutally competitive space, especially for WooCommerce. Every week, a new contender emerges, promising a slick design, one-click installation, and a feature set that will supposedly launch your e-commerce venture into the stratosphere. The reality is often a tangled mess of dependencies, performance bottlenecks, and a "one-click" demo import that breaks more than it builds. It's into this arena that we find the Neotek - Electronics WordPress Theme, a product aimed squarely at online stores dealing in tech, gadgets, and electronics, with added promises of multi-vendor support. As developers and technical journalists, we don't care about the flashy marketing page; we care about what's under the hood. This is a ground-up review and installation guide, testing the claims and exposing the realities of building a real store with Neotek.
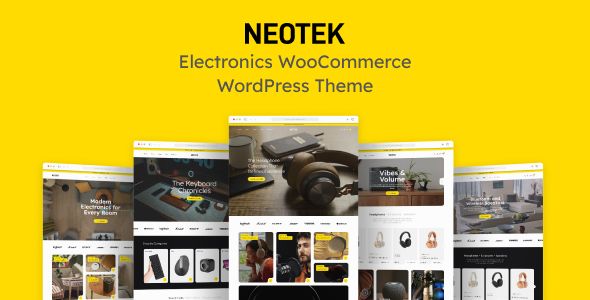
First Impressions: The Promise of the Demo
Loading up the Neotek demo site reveals a clean, modern, and competent design. It ticks all the boxes you'd expect for an electronics store: prominent hero sliders for featured products, mega menus capable of handling complex product categories, deal-of-the-day countdown timers, and product grids with quick-view and wishlist functionalities. The aesthetic is reminiscent of major online retailers, which is a good thing. It feels familiar and trustworthy, avoiding overly artistic flourishes that might confuse a customer looking for a specific graphics card or smartphone.
The design relies heavily on Elementor, which is both a strength and a potential weakness. It promises immense flexibility for those comfortable with the page builder but also signals a heavy reliance on a specific plugin ecosystem. The theme also advertises compatibility with Dokan and WC Vendors for multi-vendor marketplace functionality, a significant feature that sets it apart from more generic WooCommerce themes. The initial impression is solid—it looks the part. But a pretty demo is easy to build. The real test is whether a regular user can replicate it and if the underlying framework is robust enough for a production environment.
The Definitive Installation and Setup Guide
Let's get our hands dirty. This is a step-by-step walkthrough of installing Neotek from scratch, including the common pitfalls and best practices that the official documentation often glosses over.
Step 1: Prerequisites and Environment Check
Before you even think about uploading the theme file, ensure your hosting environment is up to the task. A theme like Neotek, loaded with plugins like WooCommerce and Elementor, is not suited for bargain-bin shared hosting.
WordPress Version: 5.5 or higher. As of this writing, you should be on the latest stable version of WordPress.
PHP Version: 7.4 or higher. PHP 8.0+ is recommended for performance and security. Check your host's cPanel or dashboard to verify and upgrade if necessary.
Memory Limit: A minimum
WP_MEMORY_LIMITof 256M is non-negotiable. 512M is better. You can often set this in yourwp-config.phpfile by addingdefine('WP_MEMORY_LIMIT', '256M');.Execution Time: The demo import process can be resource-intensive. Ensure your
max_execution_timeis set to at least 300 seconds to prevent timeouts.
Failure to meet these requirements is the number one cause of failed demo imports and general site instability. Don't skip this step.
Step 2: Acquiring and Uploading the Theme Files
Once you've downloaded the theme package, you'll find it's a .zip file containing more than just the installable theme. Unzip this main package on your local computer first. Inside, you will typically find:
neotek.zip(The Parent Theme)neotek-child.zip(The Child Theme)Documentation folder
Licensing information
Possibly some demo content files or PSDs
This is critical: Never install the main package file directly to WordPress. You must use the neotek.zip file.
To install:
Log in to your WordPress dashboard.
Navigate to Appearance > Themes > Add New.
Click Upload Theme.
Choose the
neotek.zipfile and click Install Now.Do not activate it yet. Go back to the Add New/Upload screen.
Now, choose the
neotek-child.zipfile and click Install Now.Once the child theme is installed, activate the Child Theme.
Why use a child theme? Any custom code, CSS, or template modifications you make should go into the child theme. When the parent Neotek theme receives an update, you can update it without losing all your customizations. Working directly on the parent theme is a cardinal sin in WordPress development that will inevitably lead to lost work.
Step 3: Installing the Required and Recommended Plugins
Upon activating the child theme, you should see a notification banner at the top of your dashboard prompting you to install required plugins. This is typically handled by the TGM Plugin Activation script, a standard tool in the premium theme world.
Click the "Begin installing plugins" link. You'll be taken to a screen listing all the plugins the theme wants to install. Neotek's list is substantial and usually includes:
Elementor: The core page builder.
WooCommerce: The e-commerce engine.
Neotek Core: A custom plugin that houses the theme's core functionality, custom post types, and Elementor widgets. This is essential.
Contact Form 7: For contact forms.
Slider Revolution: A premium slider plugin often bundled.
WooCommerce Wishlist & Compare: To add these common e-commerce features.
One Click Demo Import: The tool to import the demo content.
Select all the plugins, choose "Install" from the bulk actions dropdown, and apply. Wait for the process to complete. Once installed, return to the plugin installer screen, select them all again, and choose "Activate" from the bulk actions dropdown.
Step 4: The One-Click Demo Import
With the theme and plugins active, it's time to import the demo content that makes the site look like the live preview.
Navigate to Appearance > Import Demo Data (the location may vary slightly, but it's usually under Appearance).
You'll see one or more available demos. Choose the main demo that aligns with your vision.
Important: This process works best on a fresh WordPress installation. If you have existing content, it will be mixed in with the demo content, which can create a mess. Always back up your site before an import.
Click the "Import" button. The process will now download and import content, widgets, and theme settings. This can take several minutes. Do not navigate away from the page or close your browser.
You should receive a success message when it's complete.
Step 5: Post-Import Sanity Check
The import process isn't always flawless. After it's done, you need to perform a few checks to ensure everything is working correctly.
Homepage: Go to Settings > Reading. Make sure "Your homepage displays" is set to "A static page" and the correct "Homepage" (e.g., "Home 1") is selected from the dropdown.
Menus: Navigate to Appearance > Menus. Check the "Manage Locations" tab. Assign the imported "Primary Menu" to the Primary Menu location. Sometimes this link is broken during import.
Permalinks: Go to Settings > Permalinks. Select the "Post name" option and click "Save Changes." This re-saves your URL structure and can fix many 404 errors on newly imported pages.
Widgets: Visit Appearance > Widgets to ensure the sidebars and footer areas have been populated correctly. You might need to drag and drop a few widgets into place manually.
After these steps, your site should closely mirror the theme's demo, providing a solid foundation for you to start replacing content with your own.
Under the Hood: A Developer's Critique
A functional demo import is one thing. A well-engineered theme is another. Let's analyze the core components of Neotek from a technical standpoint.
Elementor Integration and Custom Widgets
Neotek's entire value proposition hinges on its integration with Elementor. The theme provides a suite of custom "Neotek" widgets within the Elementor editor. These are specifically designed for e-commerce, including things like advanced product grids, category showcases, brand carousels, and AJAX-powered product tabs.
The implementation here is fairly standard. The custom widgets are housed in the "Neotek Core" plugin, which is a good practice as it separates functionality from presentation. The widgets themselves offer a decent range of customization options, allowing you to control layouts, query specific products or categories, and tweak styling. However, they are not as granular as some premium, standalone Elementor add-on packs. You're working within the confines of what the Neotek developers have provided. For most store owners, this is sufficient. For developers wanting to build something truly unique, you might find yourself overriding styles or wishing for more hooks and filters.
The Theme Options Panel
Beyond Elementor, global site settings are managed through the WordPress Customizer (Appearance > Customize). This is the modern, standard way to handle theme options, and Neotek does a competent job.
The panel is logically organized into sections like Header, Footer, Blog, Shop, Typography, and Styling. You can upload logos, change primary and secondary colors, select from a wide range of Google Fonts, and configure header layouts (e.g., centered logo, search bar position). The options for the WooCommerce shop pages are particularly important. You can toggle the visibility of elements like breadcrumbs, results counts, and sorting dropdowns. You can also choose the default number of columns for product archives. While comprehensive, it lacks the extreme power-user features of some top-tier themes, such as a built-in hook editor or full white-labeling capabilities.
Performance Profile and Code Quality
This is where many feature-rich themes fall apart. Out of the box, after a fresh demo import and with no caching plugins installed, the performance is… average. Running a GTmetrix or PageSpeed Insights test reveals what you'd expect from an Elementor/WooCommerce combination: a high number of DOM elements and a significant number of CSS and JavaScript requests.
HTTP Requests: A fresh install can easily generate 80-100 requests, which is high. A good caching and asset optimization plugin (like WP Rocket or Perfmatters) is not just recommended; it's mandatory for a production site built on Neotek.
Code Bloat: The theme loads a considerable amount of CSS and JS to handle all its features—sliders, carousels, pop-ups, etc. Much of this is loaded site-wide, even on pages that don't use those features. More advanced asset unloading tools would be needed to trim this down effectively.
Dependencies: The theme relies on a stack of plugins to function. This isn't inherently bad, but it means you are responsible for keeping not just the theme but 10+ plugins updated and ensuring they don't have conflicts. It increases the complexity and potential points of failure for the site.
The code itself appears to follow general WordPress standards. The separation of concerns into the core plugin is a positive sign. However, like most themes at this price point, it's built for features first and peak performance second. You can make it fast, but you'll have to put in the optimization work yourself.
WooCommerce and Multi-Vendor Integration
Neotek's WooCommerce integration is its strongest asset. The custom styling for shop pages, single product pages, cart, and checkout is cohesive and professional. It supports all standard WooCommerce features out of the box. The addition of wishlist and compare functionality via bundled plugins is a welcome touch that saves you from having to find and integrate these yourself.
The multi-vendor support is primarily a matter of styling and compatibility. The theme provides specific templates and styles to ensure that when you install a plugin like Dokan, the vendor dashboards and store pages don't look broken. It doesn't add new multi-vendor functionality itself; it simply ensures a smooth visual integration with the leading plugins that do. This is a crucial distinction. If you plan to build a marketplace, Neotek provides a great visual starting point, but the core marketplace logic will be handled entirely by your chosen multi-vendor plugin.
The Final Verdict: Who Should Use Neotek?
So, after dissecting the theme, who is it actually for? Neotek occupies a specific niche and is not a one-size-fits-all solution.
Pros:
Feature-Complete for Electronics Stores: It comes with nearly every feature an electronics e-commerce site would need, from mega menus to product countdowns and comparison tools.
Solid Demo Import: The one-click importer works reliably on a properly configured server, providing a massive head start on development.
Clean, Modern Design: The aesthetic is professional and builds trust, which is crucial for selling high-ticket electronics.
Good Elementor Integration: The custom widgets are useful and make building complex product-focused layouts relatively easy for non-coders.
Cons:
Performance Requires Work: Out-of-the-box speed is mediocre due to bloat. You must be prepared to implement a robust caching and optimization strategy.
High Plugin Dependency: The theme's reliance on a large number of plugins increases maintenance overhead and the potential for conflicts.
Somewhat Generic: While clean, the design doesn't break new ground. Your store might end up looking similar to many others using similar themes.
Limited for Advanced Customization: Developers looking for a lightweight, highly extensible framework will find Neotek restrictive and bloated. It's a "finished solution," not a "starter theme."
The Ideal User
Neotek is best suited for small business owners or entrepreneurs who want to launch a professional-looking electronics or gadget store quickly and without writing code. If your primary tool is Elementor and you want a theme that provides all the necessary e-commerce bells and whistles in one package, Neotek is a strong contender. It's also a viable choice for freelance developers or small agencies building sites for clients on a tight budget, where speed of development is more important than achieving a perfect 100/100 performance score.
It is not for performance purists, developers who prefer the block editor (Gutenberg) over page builders, or large-scale enterprises that require a highly customized, lean, and scalable solution.
Ultimately, Neotek delivers on its core promise: it's a feature-packed theme that can help you build a visually appealing electronics store. Its value comes from the pre-built design and bundled functionality. While you can find many Free download WordPress themes on sites like gpldock, a specialized theme like Neotek provides a targeted solution that can save dozens of hours in setup and configuration, provided you understand its limitations and are prepared to manage its performance. It's a tool—a powerful but heavy one—and like any tool, it's only as good as the hands that wield it.